Every great portrait tells a story, but the story doesn’t end the moment the shutter clicks. What happens after capture, the careful, deliberate process of refining light, skin, color, and detail, is what separates an amateur snapshot from an image clients are proud to publish. This process is called portrait retouching, and it has quietly become one of the most valuable skills in modern photography.
Portrait retouching is the art and craft of enhancing a photograph of a person while keeping the result looking natural, flattering, and true to life. It’s not about transforming someone into a different person. It’s about removing distractions, like a stray hair, an unflattering shadow, a temporary blemish, so the viewer’s eye stays on what matters: the subject’s expression, personality, and presence.
For eCommerce business owners selling apparel, jewelry, cosmetics, or accessories, model and portrait images directly influence buying decisions. For photography agencies, consistent and professional editing is what keeps clients coming back. Either way, understanding a structured portrait retouching workflow isn’t optional anymore. It’s a competitive necessity.
This guide walks through a complete, professional portrait retouching workflow, from RAW capture to final export, including the tools, techniques, and common mistakes to avoid along the way.
What Is a Portrait Retouching Workflow?
Definition of Portrait Retouching
Portrait retouching refers to the post-production process of refining a photograph of a person. This includes correcting exposure and color, smoothing skin while preserving texture, removing temporary imperfections, enhancing eyes and features, and fine-tuning lighting and tone. The goal is always realism with polish, not artificial perfection.
Why a Structured Workflow Is Important
Without a defined workflow, editing becomes inconsistent and time-consuming. A photographer might over-edit one image and under-edit the next, creating a mismatched gallery. A structured workflow ensures every image passes through the same stages in the same order, which builds consistency, predictability, and speed. This matters enormously when you’re editing dozens or hundreds of images for a product catalog or a wedding gallery.
Benefits of Professional Portrait Editing
A well-executed retouching workflow delivers more than just prettier pictures. It builds brand trust for eCommerce stores, since shoppers respond to clean, professional model photography. It saves photographers time by reducing guesswork. It creates a recognizable visual style that clients associate with quality. And it protects the photographer’s reputation, since a single poorly edited photo can undermine an otherwise excellent shoot.
Essential Tools for Portrait Retouching
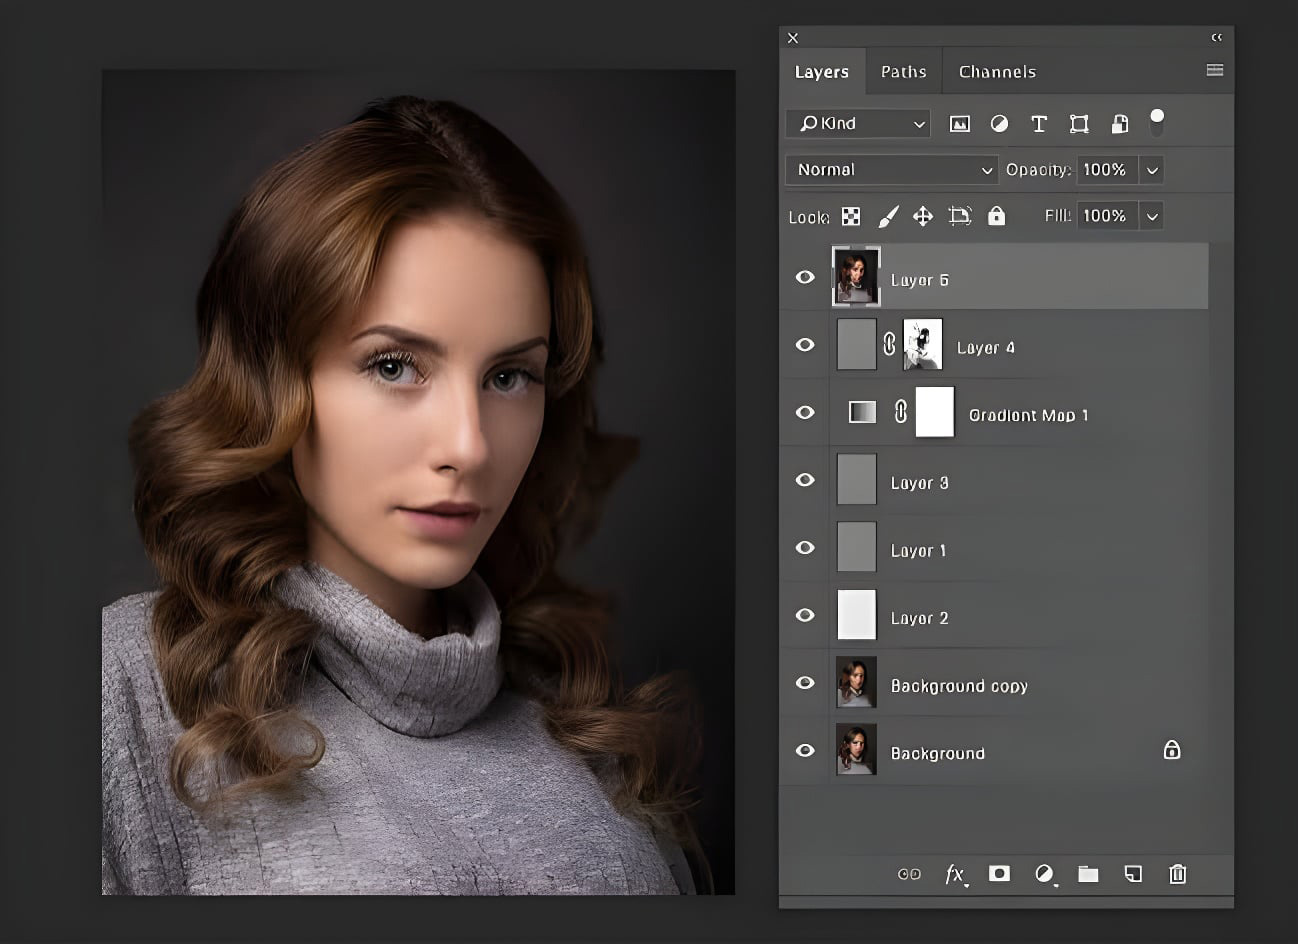
Adobe Photoshop
Photoshop remains the industry standard for detailed, pixel-level retouching. Its layer-based system, frequency separation capabilities, and Liquify tool make it the go-to choice for skin retouching, dodge and burn work, and fine detail correction.
Adobe Lightroom
Lightroom is best suited for the early stages of editing: exposure correction, white balance, color grading, and batch processing. Many professionals use Lightroom to handle the bulk adjustments before sending select images into Photoshop for detailed work.
Capture One
Popular among fashion and studio photographers, Capture One offers superior color grading tools and tethered shooting capabilities. Its skin tone editing tools are particularly praised for producing natural, flattering results straight out of RAW processing.
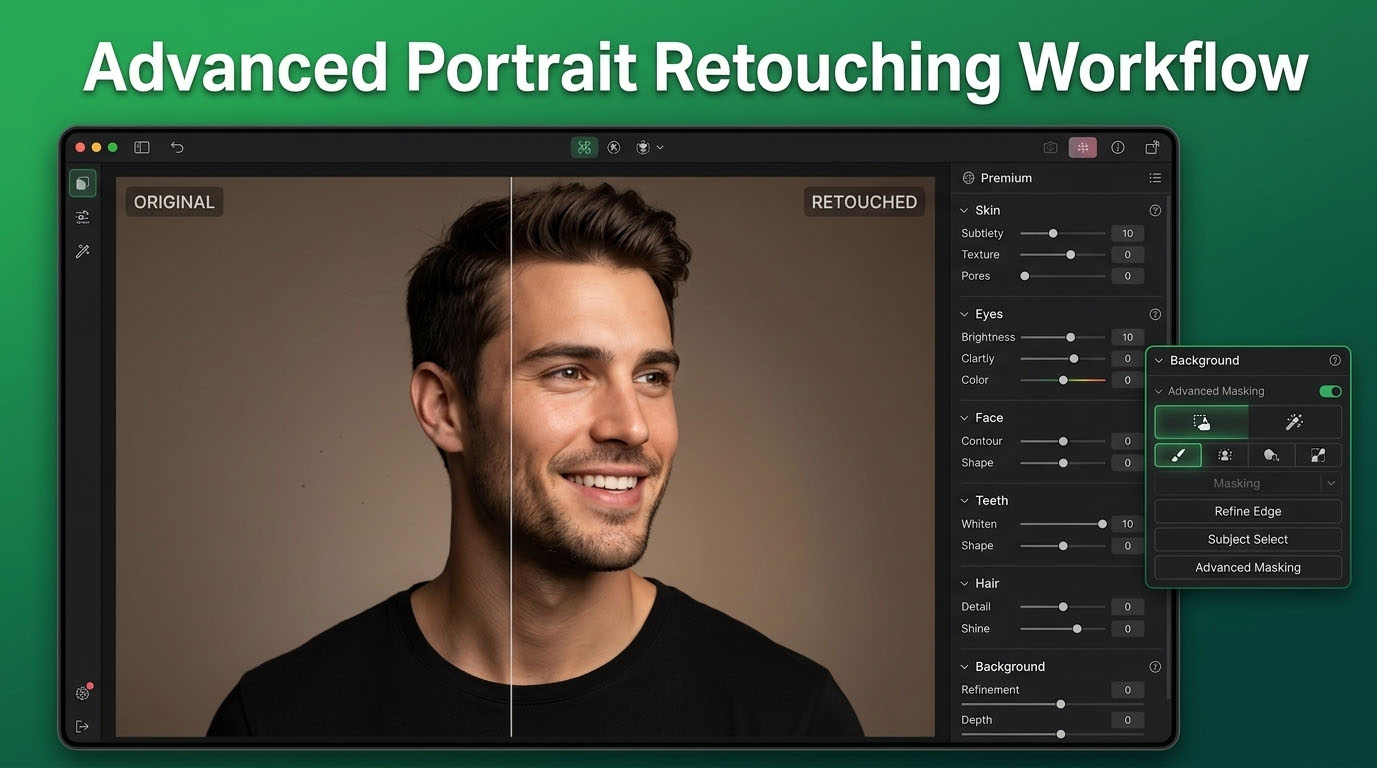
AI Portrait Retouching Tools
AI-powered plugins and standalone apps, such as automated skin smoothing or background tools, can speed up repetitive tasks significantly. They’re useful for high-volume work, but they shouldn’t replace human judgment entirely, a point worth remembering, and one we’ll return to later in this guide.
Stage 1 – RAW Capture and Image Selection
Why Shooting in RAW Matters
A retouching workflow starts before editing even begins, at the moment of capture. RAW files retain significantly more image data than JPEGs, giving editors far more flexibility to correct exposure, white balance, and highlights without degrading quality. For any business relying on professional image quality, shooting RAW isn’t a luxury, it’s the foundation everything else is built on.
Selecting the Best Portraits
Not every frame deserves the editing investment. Culling, the process of choosing the strongest images from a shoot, saves hours of unnecessary work. Look for sharp focus on the eyes, natural expressions, and flattering poses before committing to detailed retouching.
Organizing Files for Faster Editing
A simple folder structure and consistent naming convention may sound unglamorous, but it pays off enormously when managing large batches of images for eCommerce catalogs or agency clients. Organized files mean faster retrieval, fewer mistakes, and smoother collaboration with team members or outsourced editors.
Stage 2 – Basic Portrait Adjustments
Correcting White Balance
Skin tones are extremely sensitive to color casts. A slightly warm or cool white balance can make skin look jaundiced or lifeless. Correcting white balance early ensures every subsequent edit, especially skin retouching, is built on accurate color information.
Adjusting Exposure and Contrast

Balanced exposure brings out detail in both shadows and highlights without flattening the image. Subtle contrast adjustments add depth and dimension, helping the subject stand out from the background.
Cropping and Composition
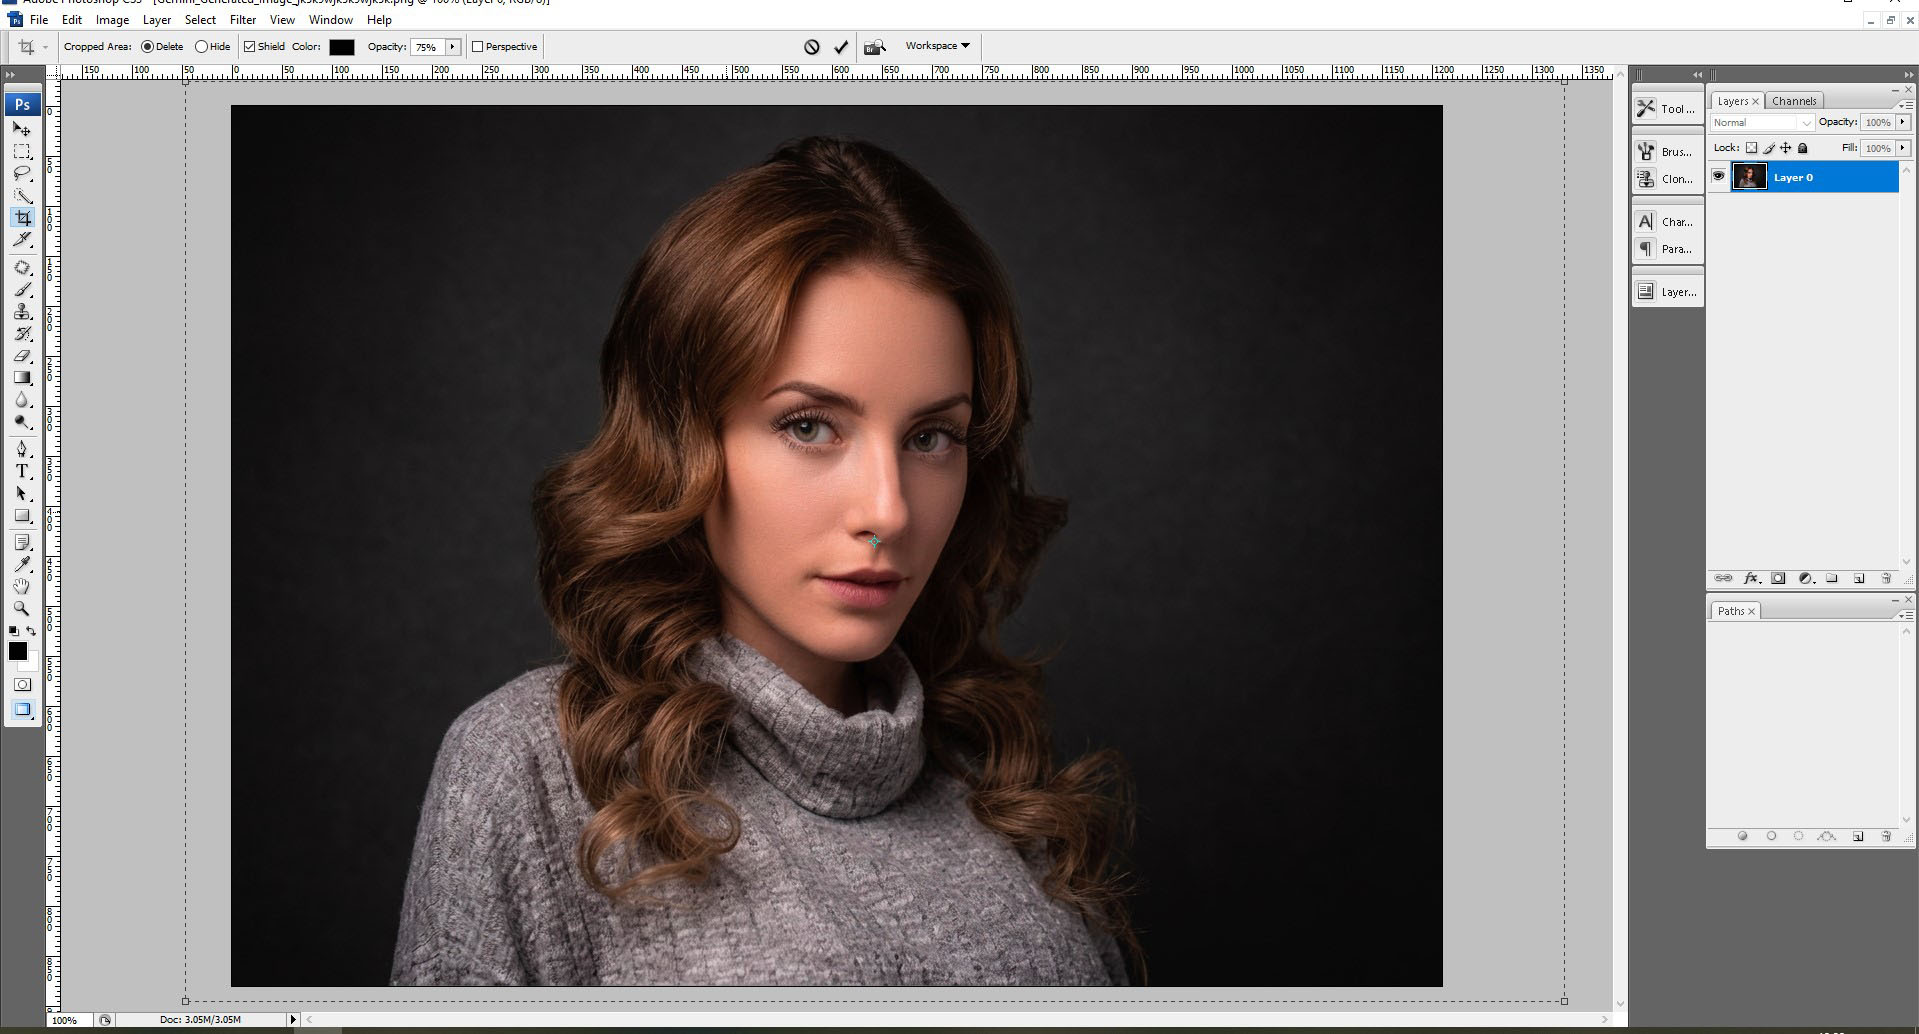
Cropping isn’t just about removing distractions from the frame. It’s about reinforcing visual hierarchy and ensuring the composition draws attention to the subject’s face or the product being showcased, which is especially important for eCommerce model shots.
Lens Correction and Color Fringing Removal
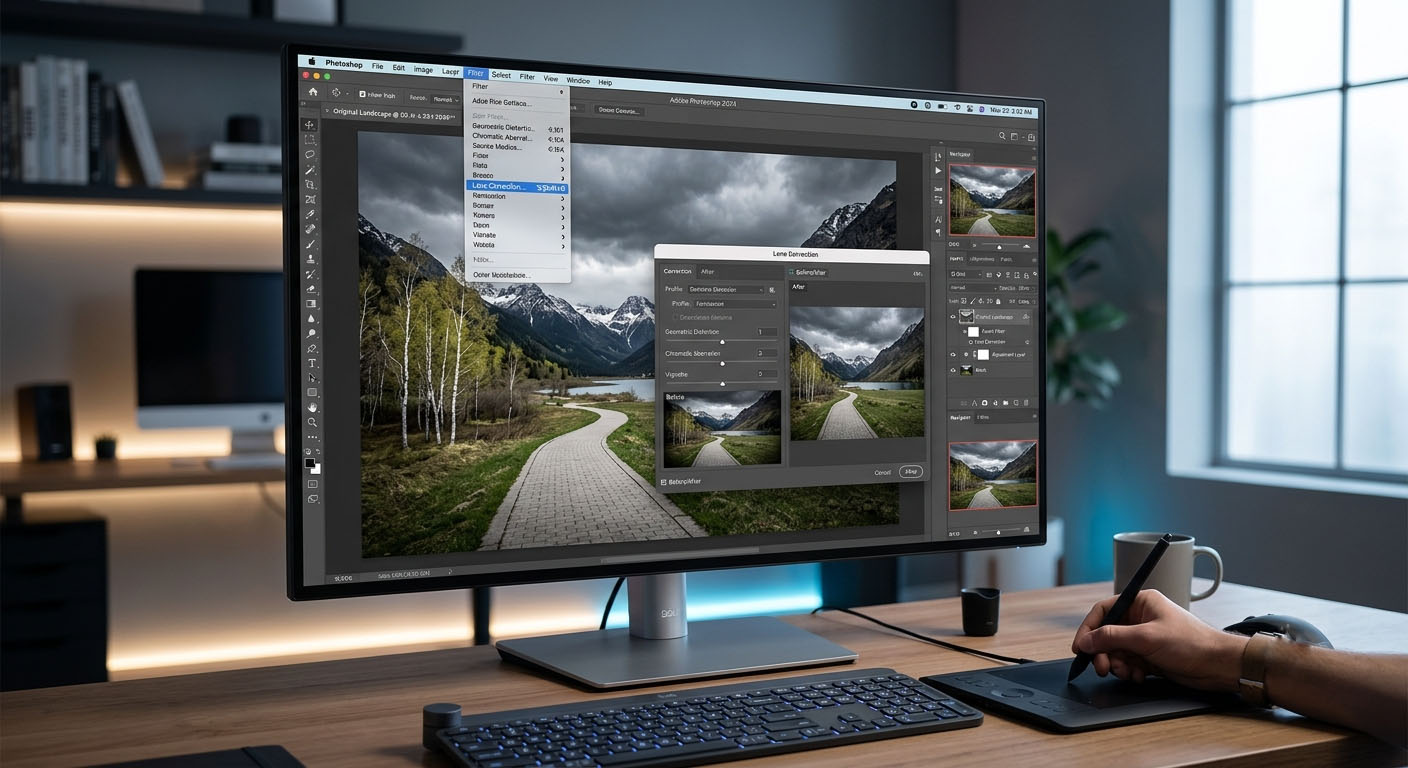
Wide-angle lenses can distort facial features, and chromatic aberration can create unwanted color fringing around high-contrast edges, like hair against a bright background. Lens correction tools fix these issues automatically in most editing software, restoring a natural, undistorted look.
Stage 3 – Skin Retouching and Blemish Removal
This is where portrait retouching truly earns its reputation as a craft.
Frequency Separation Technique
Frequency separation is the gold standard for professional skin retouching. It separates an image into two layers: one containing color and tone information, the other containing texture and detail. This allows editors to smooth skin tone and remove discoloration without touching the underlying texture, preserving pores and fine detail for a natural result.
Removing Temporary Blemishes
Temporary imperfections, breakouts, small scratches, or stray marks, are typically removed using the healing brush or clone stamp tool. The key word here is temporary. Permanent features like freckles, moles, or scars should generally be preserved unless the client specifically requests otherwise.
Preserving Natural Skin Texture
Nothing signals amateur editing faster than plastic-looking, overly smoothed skin. Professional retouchers always retain some texture, pores, fine lines, subtle variation, because real skin has texture, and viewers subconsciously notice when it’s missing.
Common Skin Retouching Mistakes
The most frequent mistake is applying too much smoothing across the entire face uniformly. Skilled editors vary their approach by area, smoothing cheeks and forehead more than texture-rich zones like eyebrows or hairlines, and they always zoom out periodically to check the image at normal viewing size rather than judging quality at 100% zoom.
Stage 4 – Refining Portrait Details
Wrinkle Retouching
Wrinkles should be softened, not erased, unless requested otherwise. Reducing harsh shadows around fine lines while keeping the wrinkle’s natural shape preserves authenticity and avoids an artificial, ageless look that feels dishonest.
Hair and Flyaway Cleanup
Stray hairs and flyaways can be distracting, especially in outdoor or windy shoots. Careful spot healing or clone stamping cleans these up without disturbing the natural flow and volume of the hairstyle.
Clothing and Fabric Adjustments
For eCommerce model photography in particular, clothing needs to look as flawless as the skin. This includes removing wrinkles in fabric, straightening seams, and correcting fit issues that distract from how a garment actually looks on the body.
Teeth Whitening
A subtle whitening adjustment, never overdone, brightens a smile naturally. Excessive whitening creates an unnatural, almost glowing effect that immediately signals heavy editing.
Eyeglass Glare Removal
Glare on glasses is a common and frustrating issue. Editors typically address this by blending in detail from a second photo taken at a slightly different angle, or by manually painting in eye detail using nearby reference areas.
Stage 5 – Advanced Portrait Enhancements
Eye Enhancement Techniques
Eyes are the focal point of nearly every portrait. Subtle sharpening, slight brightness boosts to the iris, and gentle whitening of the sclera can make eyes pop without looking artificial. The goal is enhancement, not transformation.
Using Liquify Naturally
Liquify is a powerful tool for adjusting posture, smoothing clothing lines, or making minor proportion adjustments. However, it’s also one of the easiest tools to overuse. Small, restrained adjustments preserve realism, while aggressive reshaping tends to look obviously manipulated and can damage trust with viewers and clients alike.
Adding Depth with Micro Contrast
Micro contrast, fine adjustments to local contrast in small areas, adds a sense of depth and dimensionality to a portrait. This technique brings out detail in fabric, hair, and skin texture without affecting overall exposure or color balance.
Enhancing Portrait Lighting
Dodge and burn techniques, lightening and darkening specific areas, allow editors to sculpt the face with light and shadow, adding dimension that may have been lost during capture. This is especially useful for correcting flat lighting from on-camera flash or overcast conditions.
Stage 6 – Color Grading and Final Output
Creating a Consistent Color Style
Color grading gives a photographer or brand its signature look. Whether warm and golden or cool and editorial, a consistent color style across all images strengthens brand identity, particularly important for eCommerce stores building a recognizable visual catalog.
Choosing the Right Color Space
sRGB is the standard for web and digital use, ensuring colors display accurately across browsers and devices. Adobe RGB or CMYK, by contrast, are typically reserved for print work where color accuracy on physical media matters more.
Export Settings for Web
Web images should be optimized for fast loading without sacrificing visible quality. JPEG at 72-100 DPI, with file size compressed appropriately, is the standard for eCommerce listings and online galleries.
Export Settings for Print
Print requires significantly higher resolution, typically 300 DPI, along with attention to color profile and bleed requirements depending on the final printed product.
Common Portrait Retouching Mistakes to Avoid
Over-Smoothing Skin
This remains the single most common error in portrait retouching. Skin that looks like plastic or wax instead of human tissue immediately undermines the credibility of an image, regardless of how good the rest of the edit is.
Excessive Sharpening
Over sharpening creates harsh edges and an unnatural, gritty appearance, particularly around the eyes and hairline. Sharpening should enhance detail subtly, not announce itself.
Unrealistic Colors
Pushing saturation or color grading too far can make skin tones look sunburnt, jaundiced, or simply artificial. Color adjustments should always be checked against natural skin tone references.
Overusing AI Tools
AI retouching tools are genuinely useful for speeding up repetitive tasks, but relying on them entirely removes the nuanced judgment that distinguishes professional retouching from generic, templated results. AI doesn’t understand a brand’s visual identity or a client’s specific preferences the way an experienced human editor does.
Why Outsource Professional Portrait Retouching Services?
Save Time and Increase Productivity
Editing is time-intensive, often more time-consuming than the actual photoshoot. Outsourcing retouching frees photographers and eCommerce teams to focus on shooting, sourcing, and growing their business instead of spending hours per image in post-production.
Maintain Consistent Quality
Professional retouching services follow established style guides and workflows, ensuring every image, whether it’s the first or the five-hundredth in a batch, meets the same quality standard. This consistency is difficult to maintain in-house, especially during high-volume periods.
Handle Large Image Volumes Efficiently
eCommerce catalogs and photography agencies often need hundreds or thousands of images turned around quickly. Dedicated retouching teams have the workflow, staffing, and tools in place to handle large volumes without sacrificing quality or missing deadlines.
Best Practices for Natural Portrait Retouching
Keeping edits subtle is the foundation of natural-looking retouching. The best edits are the ones nobody notices. Preserving skin texture, rather than smoothing it into oblivion, keeps the subject looking like a real person rather than a digital illustration. Focusing on the subject’s personality, their expression, their eyes, their unique features, ensures the retouching enhances rather than erases what makes the portrait compelling in the first place. And maintaining consistency across all images in a set or catalog builds trust and professionalism, whether the client is a single portrait subject or an entire eCommerce product line.
Final Thoughts
A professional portrait retouching workflow isn’t a single step, it’s a sequence of deliberate stages, from RAW capture and basic adjustments through skin retouching, detail refinement, advanced enhancement, and final color grading. Each stage builds on the last, and skipping steps or rushing through them is exactly how inconsistent, unnatural results happen.
The most important principle throughout this entire process is restraint. Natural, professional editing respects the subject and enhances what’s already there rather than replacing it with something artificial. For eCommerce businesses and photography agencies alike, mastering, or outsourcing, this workflow translates directly into stronger brand image, higher customer trust, and ultimately, better business results.
If managing this workflow in-house feels overwhelming, or if your team needs consistent, high-quality results at scale, partnering with a professional portrait retouching service can be the difference between images that simply look fine and images that truly sell.
Frequently Asked Questions (FAQ)
What is portrait retouching?
Portrait retouching is the post-production process of enhancing a photograph of a person, correcting color and exposure, smoothing skin while preserving natural texture, and refining details, while keeping the final result looking realistic and natural.
Which software is best for portrait retouching?
Adobe Photoshop is the industry standard for detailed retouching work, while Lightroom and Capture One are excellent for color grading, batch editing, and initial adjustments. Most professionals use a combination of these tools depending on the stage of editing.
Can AI replace manual portrait retouching?
AI tools can speed up repetitive tasks like basic skin smoothing or background removal, but they generally lack the nuanced judgment needed for natural-looking results and brand-specific style consistency. Most professionals use AI as a supplement, not a replacement, for manual editing.
How long does professional portrait retouching take?
Editing time varies based on complexity, ranging from a few minutes for basic adjustments to thirty minutes or more per image for detailed, high-end retouching. Volume work for eCommerce catalogs is typically streamlined using batch processing and consistent presets.
What is the best workflow for natural portrait editing?
The most effective workflow moves through clear stages: RAW selection, basic color and exposure correction, skin retouching using techniques like frequency separation, detail refinement, advanced enhancements, and final color grading and export, always prioritizing subtlety over heavy-handed editing.
Why should photographers outsource portrait retouching services?
Outsourcing saves significant time, ensures consistent quality across large batches of images, and allows photographers and eCommerce teams to focus on their core work rather than spending hours in post-production for every shoot.
Related Posts
High End Jewelry Retouching: Complete Guide for Stunning Jewelry Images
Every piece of jewelry tells a story — of craftsmanship,…
How to Remove Image Background in GIMP Fast & Free
To become a skilled graphic designer, mastering background removal in…